 |
| Tall centerpiece at the reception |
 |
| Enjoying the flowers post-wedding at home. |
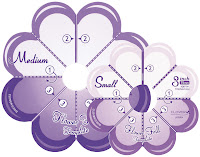
Making the flowers is very simple. Initially I bought a pattern at Joanne Fabrics that looked like this :
It was helpful to start since it shows you where to fold and cut, but if you aren't interested in buying the pattern you can do just fine without. Just follow the instructions below:
 |
| Fold square in half. |
 |
| step two: Fold in half again so you are holding a 1/4 size version of the initial square. |
 |
| step three: Fold in half again, this time from corner to corner. |
 |
| Fold each layer separately |
 | |||||||||||||||||||||||||||||||||||||||||||||||||||||
| Cut the loose ends in a semi-circle. |
 |
| step four: While holding the folds in place, sew through all four layers at the folded end. |
 |
| String onto knotted thread (I recommend a strong thread that won't break easily). |
step five: Tie the two ends of thread together, pulling tight.
step six: Pull apart the folds of each petal - POOF - your flower is done!
I used branches that I had cut to various lengths, and hot-glued the center of each flower to a branch.
Supplies Needed:
fabric - I love the look I achieved by selecting various fabrics that all "go" together
pattern (if desired)
strong thread
scissors
needle
glue gun (if you are attaching flowers to branches)
branches (if desired)
Please let me know if you have any questions or ideas that I haven't included! My next post will elaborate more on turning these flours into unique corsages that will last a lifetime! If you would like to order hand-made flowers please message me


No comments:
Post a Comment